If you own a restaurant or coffee shop and want to receive more online orders to grow your business, you need to create a restaurant ordering system that allows customers to order food from your restaurant using a web browser.
There are different ways to set up an online food ordering system. For example, you can use a third-party service such as Uber Eats or Grub Hub. But using these tools costs at least $100, and you have to pay another $399 to get started and other fees to install their app.
In order to create a food ordering system with a more cost-effective solution, in this post, we will introduce the WooCommerce product table plugin as one of the best WooCommerce restaurant ordering plugins. With the help of this plugin, you can prepare a custom table from the restaurant menu and then give the customers an online order from within your WooCommerce site.
With this solution, you don’t need to use third-party systems, resulting in saving money and increasing your profit. In addition, the features of this plugin help you to design customer-friendly tables that will make a great buying experience for your customers encouraging them to return to your site for future orders.
What do you need to create a restaurant food ordering system?
If you have designed a WordPress site for your restaurant and your site is active and usable, you have come a long way. Now, just install the following two plugins on the site to start creating your restaurant ordering system:
- Installing the WooCommerce plugin for free
Installing the WooCommerce plugin turns your restaurant site into a versatile online store. After installing this plugin, you can import your restaurant menu along with the price and allow customers to buy and order food from your site. But WooCommerce alone is not enough for building a customer-friendly online food ordering system because it does not provide you with the right tools for designing a sales page. Therefore, you must also install another plugin that we introduce below.
- WooCommerce product table plugin
The advantage of installing the WooCommerce food ordering plugin is that you can display your restaurant menu as a list in a customized table. This plugin provides everything you need to implement a restaurant ordering system. From displaying the different features of foods, pizzas, sandwiches, and more to allowing the customer to filter, search, and even add multiple foods and drinks to the shopping cart at the same time with one click.
There are many WooCommerce restaurant ordering plugins that you can use to enhance your online restaurant. However, we recommend you use the WooCommerce product table plugin that provides you with all you need to create a customer-friendly ordering menu.
Are you curious to see how this WooCommerce food ordering plugin can help you build an online food ordering system? So, keep reading.
How to create a restaurant ordering system by WooCommerce product table plugin?
WooCommerce product table plugin is a great tool for making queries and creating astonishing restaurant menus with ordering options like multi add to cart button, filtering, searching, mini cart, etc. The easy-to-use interface and powerful tools make this plugin so popular among store managers who aim to improve the customer buying experience.
Here, you can find how to create and customize a WooCommerce restaurant ordering system with this plugin in 3 simple steps.
Step 1: Install the WooCommerce product table plugin on your website
If you have already installed WooCommerce on your WordPress website, try to download and install the WooCommerce product table plugin. Then, activate it on your website. Our plugin is fully compatible with WooCommerce. So, all products you have added to WooCommerce will automatically import to our plugin after activation.
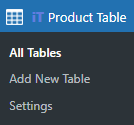
You just need to go to the WordPress Dashboard > iT Product Table > Add new table and create a new table by pressing the Get Start button.
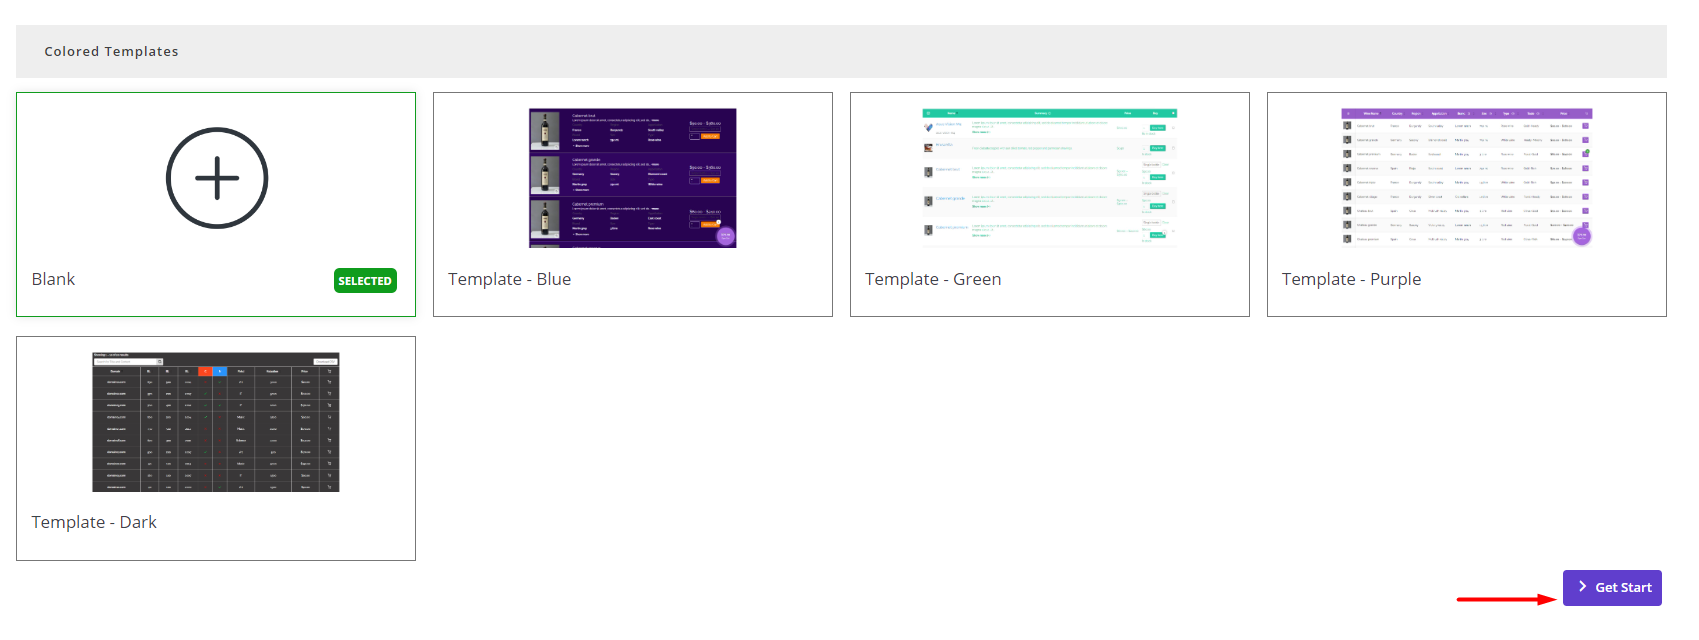
Now, you are ready to customize your WooCommerce restaurant ordering system by adding different columns to the table.
Let’s see how in the next step.
Step 2: Add columns to design your WooCommerce restaurant ordering system form
To add columns in this WooCommerce restaurant ordering plugin, first, you need to go to the Columns tab and choose Laptop from the list of devices to see the columns page.
A big button in the middle of the page allows you to add a new column to your table.

As soon as you create a new column, you can see a Column box with two separate sections, including:
- Heading: To customize the title of product table columns.
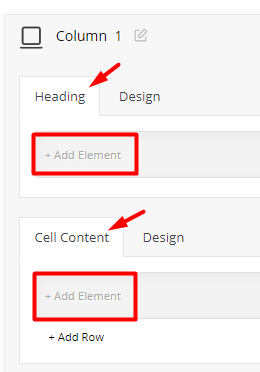
- Cell Content: To add elements to be displayed in the product table columns.
To customize each section, you need to press the Add Element option, then choose one of the Elements from the list displayed in the Left panel.
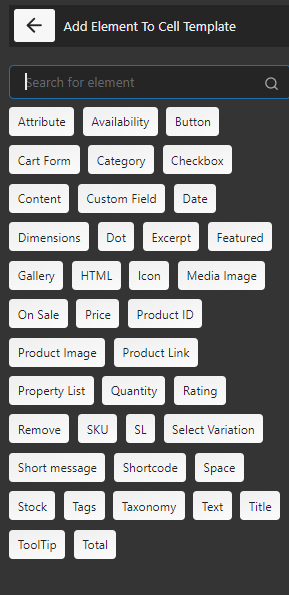
After adding one Element, the Element setting panel appears, and you can customize the content and appearance of the selected element in the cell by editing the items in the General and Style tabs, respectively.
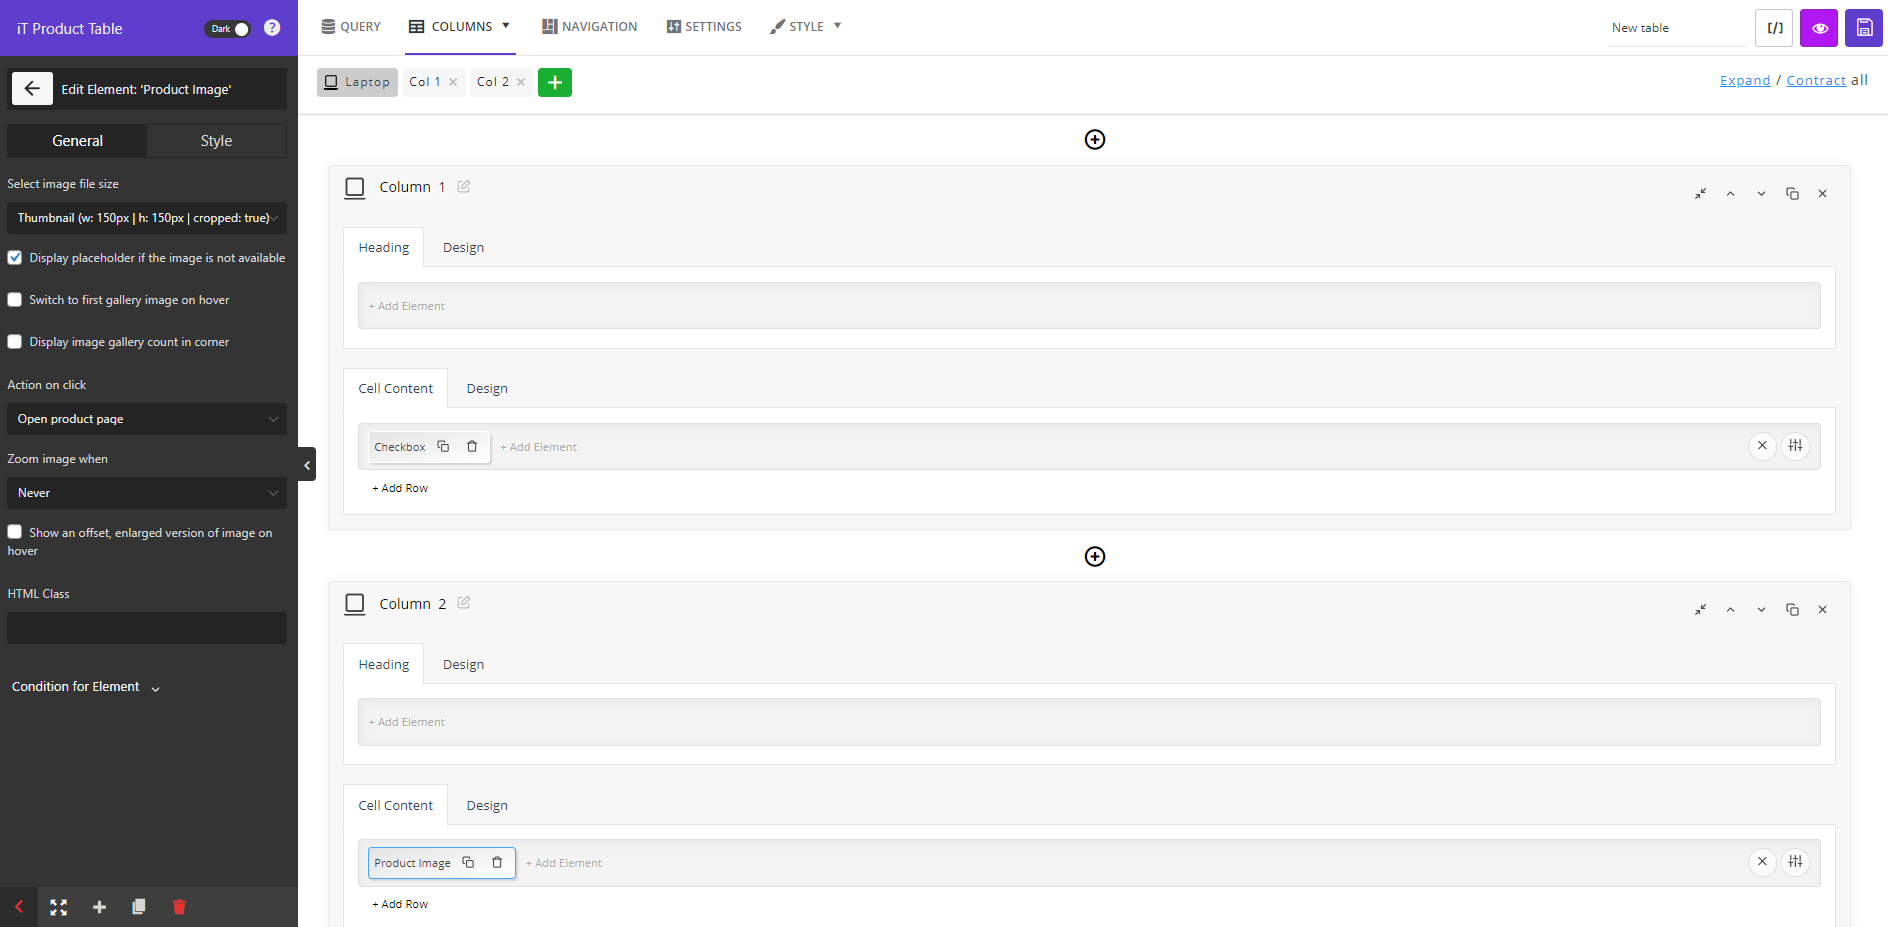
The most popular Elements that you can add to creating a WooCommerce restaurant ordering system are:
- Checkbox: To allow customers to select items to add to their carts.
- Title: To show the product title to the customers.
- Content: To let customers review the food description.
- Category: To show the food categories to the customers.
- Quantity: To let customers increase or decrease the quantity of items directly from the table.
- Price: To enable customers to review and compare the prices of different items in the restaurant ordering system.
- Add to cart button: To make the process of ordering easier for customers and let them add items to their carts with one click
So, by following the above-mentioned instructions, you can add all of these elements to your product table.
There are also some extra features on the Column page to help you create a more customized ordering system. Let’s get familiar with some of them:
Add rows to one of the product table column
One of the most useful features of this WooCommerce restaurant ordering plugin is the ability to add more than one row in one column and show different elements there.
For example, to show the Title and Description in one column, you can follow the below instructions:
- Press the Add Element option, choose Title from the Element list, and customize it by editing the items in the General and Style tabs.
- Click on the Add Row button, then in the new row, click on the Add Element option again and choose Content from the list of Elements.
- In the General tab of Content Element, write 5 in the Limit word count to instruct the plugin just display the first 5 words of the product description in the cell.

Add to cart button
Another amazing option available in our WooCommerce product table plugin is displaying an Add to Cart button in front of each row in the product table to let customers add products to their cart directly from the table.
To add this feature, you just need to choose Button from the Element List in one column and then choose Add to Cart via AJAX in the General tab. You can also edit the button label or use other items in the Link list.
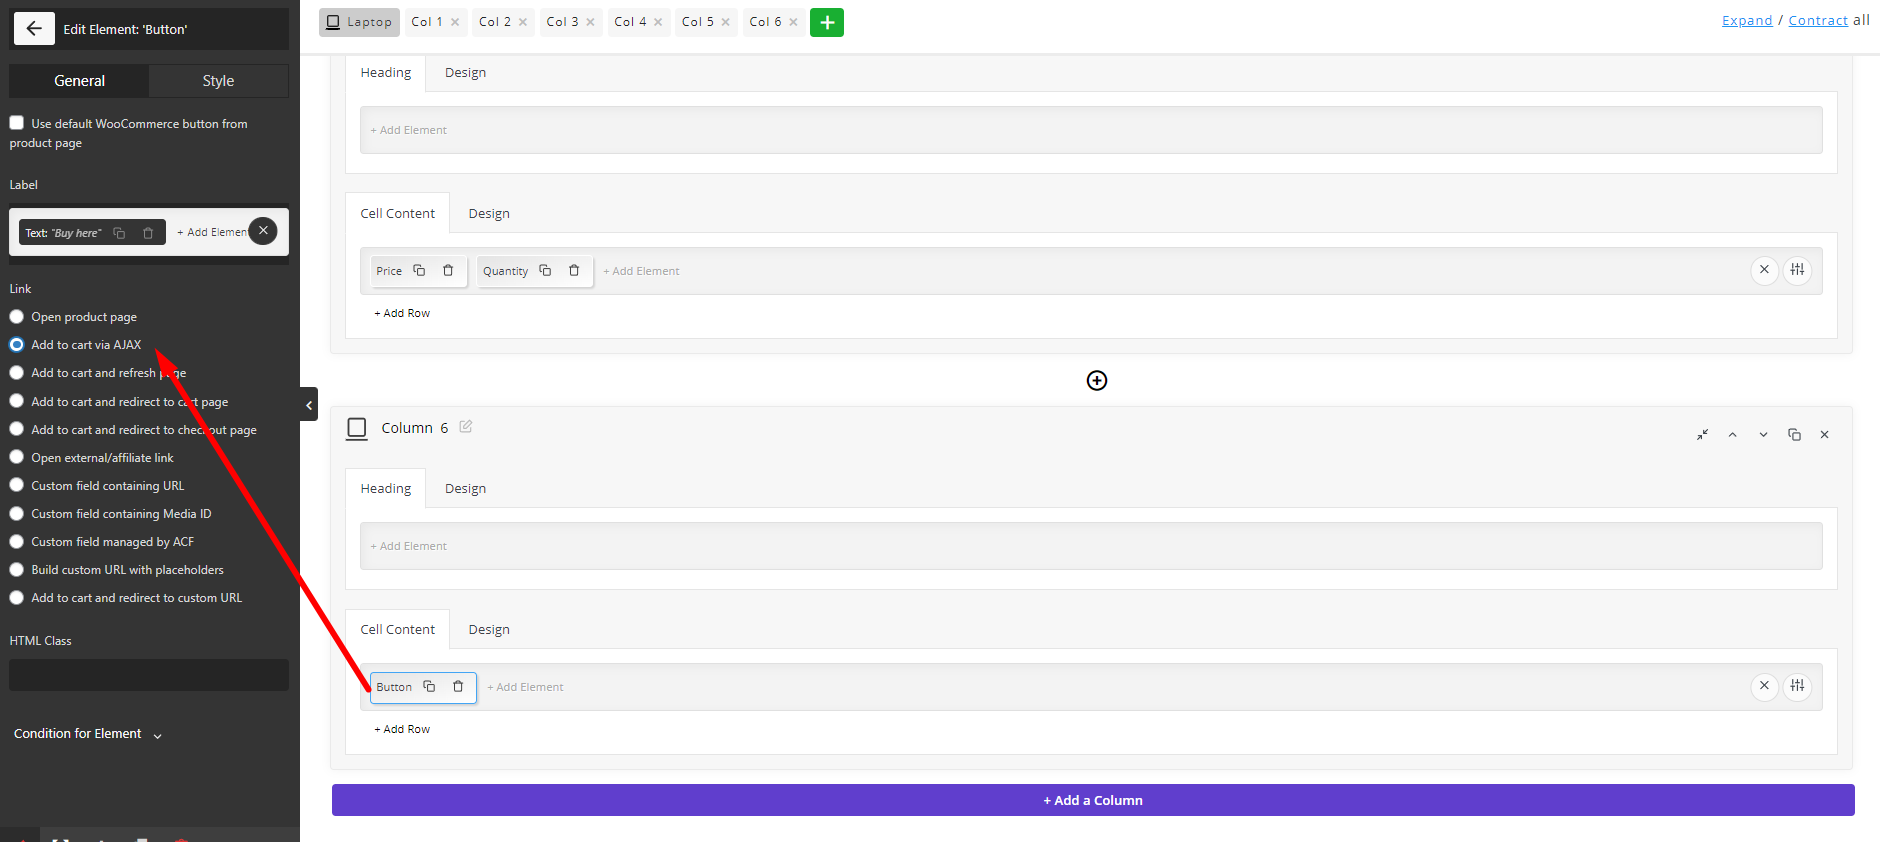
After adding and editing all columns in your WooCommerce restaurant ordering system, you can see a preview of the created table by pressing the Eye icon.
The online food ordering system that we designed in this tutorial is like below:
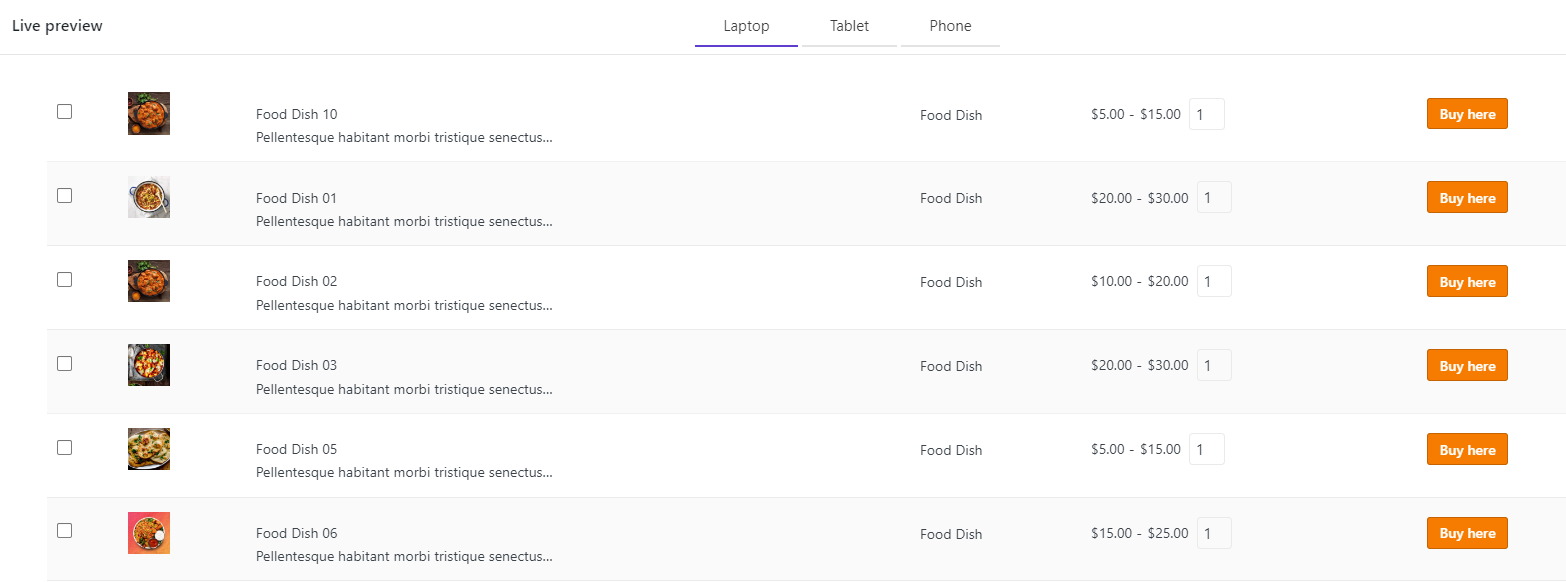
This is the simplest ordering form that you can display to your customers. However, the tools and options available in our plugin provide you with everything you need to create more practical and customer-friendly tables based on your needs. We will show you some of these tools in the Extra Features section.
Step 3: Use Shortcode to show the WooCommerce restaurant ordering system to your customers
The final step is to show the WooCommerce restaurant ordering system to your customers, which is easily possible by following the below steps:
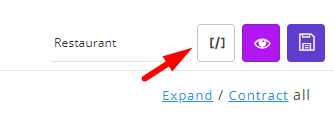
- Write a name for your table – like Restaurant in this example then save it.
- Click on the Shortcode icon to copy it.
- Go to WordPress Dashboard > Pages > Add new page.
- Paste the shortcode on the new page.
- Publish the page.

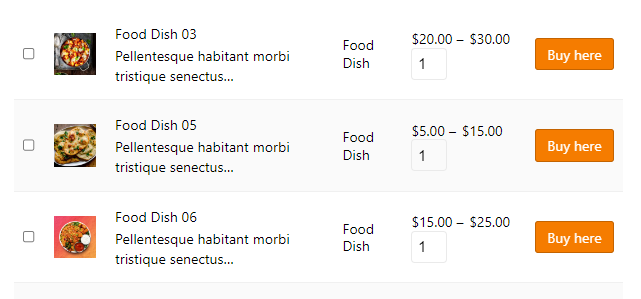
Now, you can use the URL of this page anywhere on your site to let customers use the online WooCommerce restaurant food ordering system, which is something like this:
WooCommerce Product Table Plugin
The easy way to create a restaurant food ordering system with WooCommerce

Extra features of WooCommerce product table plugin
WooCommerce product table plugin comes with a lot of fabulous features that help you convert a simple restaurant ordering system to a professional one. These features are important when you want to create a useful and eye-catching online menu to improve your customer buying experience. These extra features like filtering, sorting, multi-add to cart buttons, Mini cart, and more are the most effective ways to gain a competitive advantage in eCommerce.
Let’s get familiar with some features available in this WooCommerce restaurant ordering plugin that allows your online ordering system to attract more customers and have a better performance.
Add a quick view button to WooCommerce ordering form
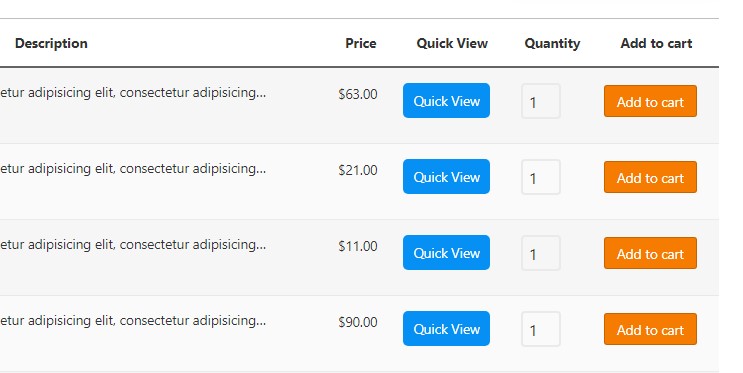
The Quick View button allows your customers to see more details about the foods on the table, so there is no need to waste their time opening each page of products on your website.
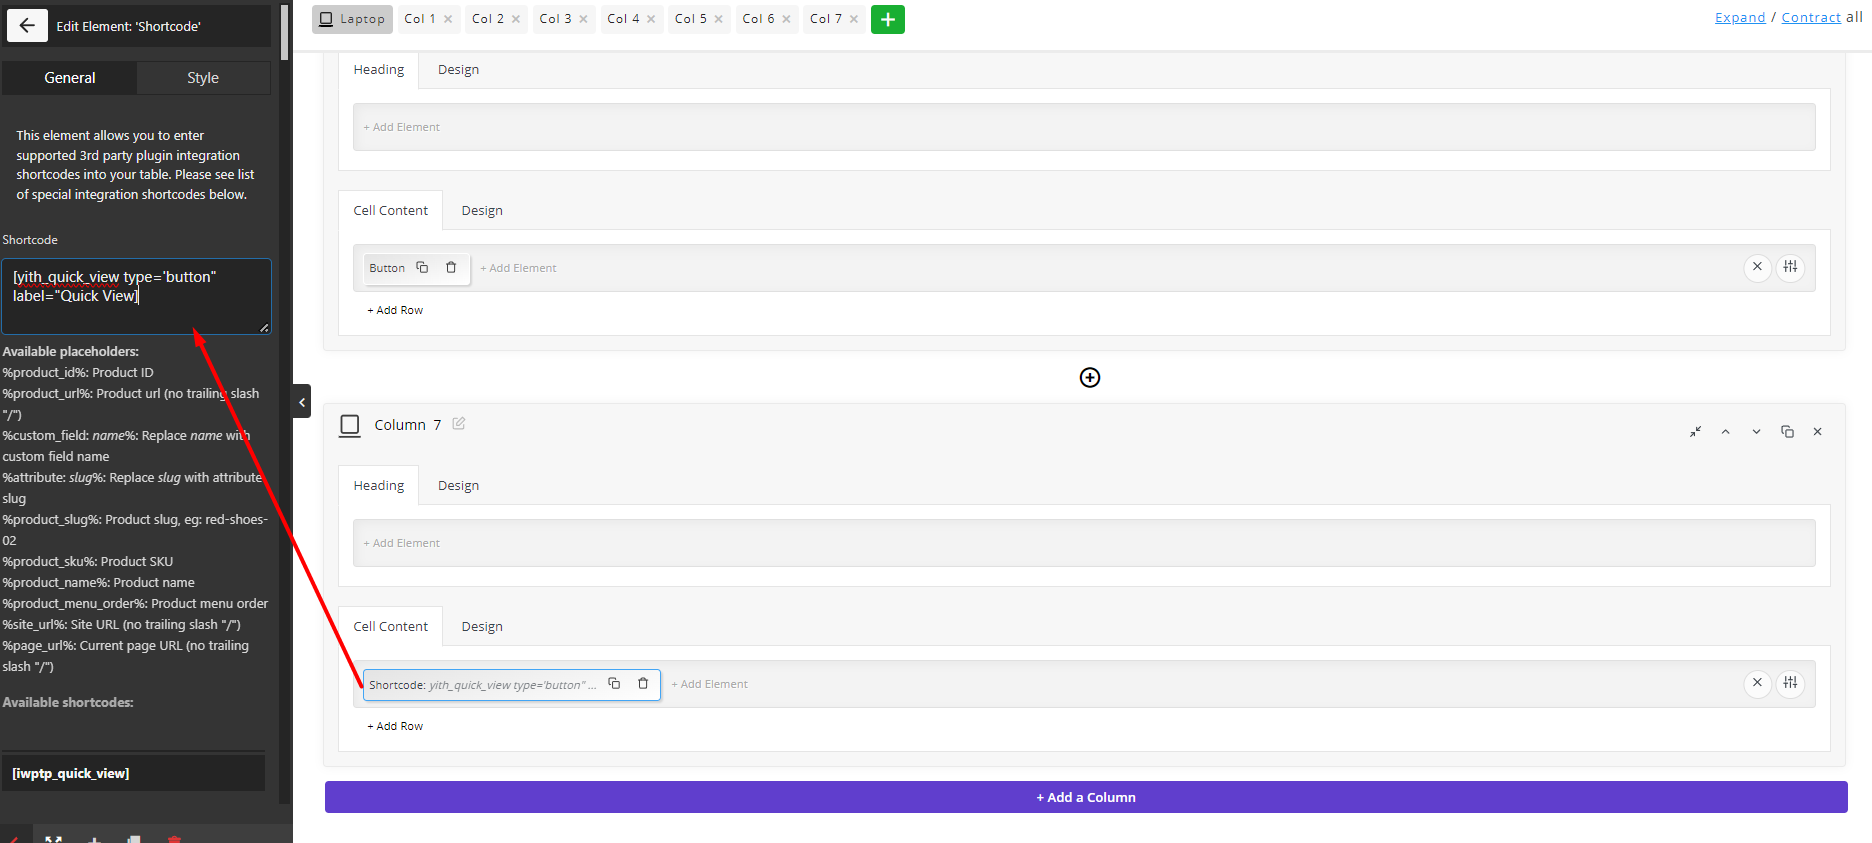
The good news is that the WooCommerce product table is compatible with other WooCommerce plugins like YITH Quick View. To add this feature to your ordering system, add the Shortcode element to one column, then insert the Quick View shortcode in the textbox available in the General tab.
The final result is like below:
Make a custom query for the restaurant food ordering system
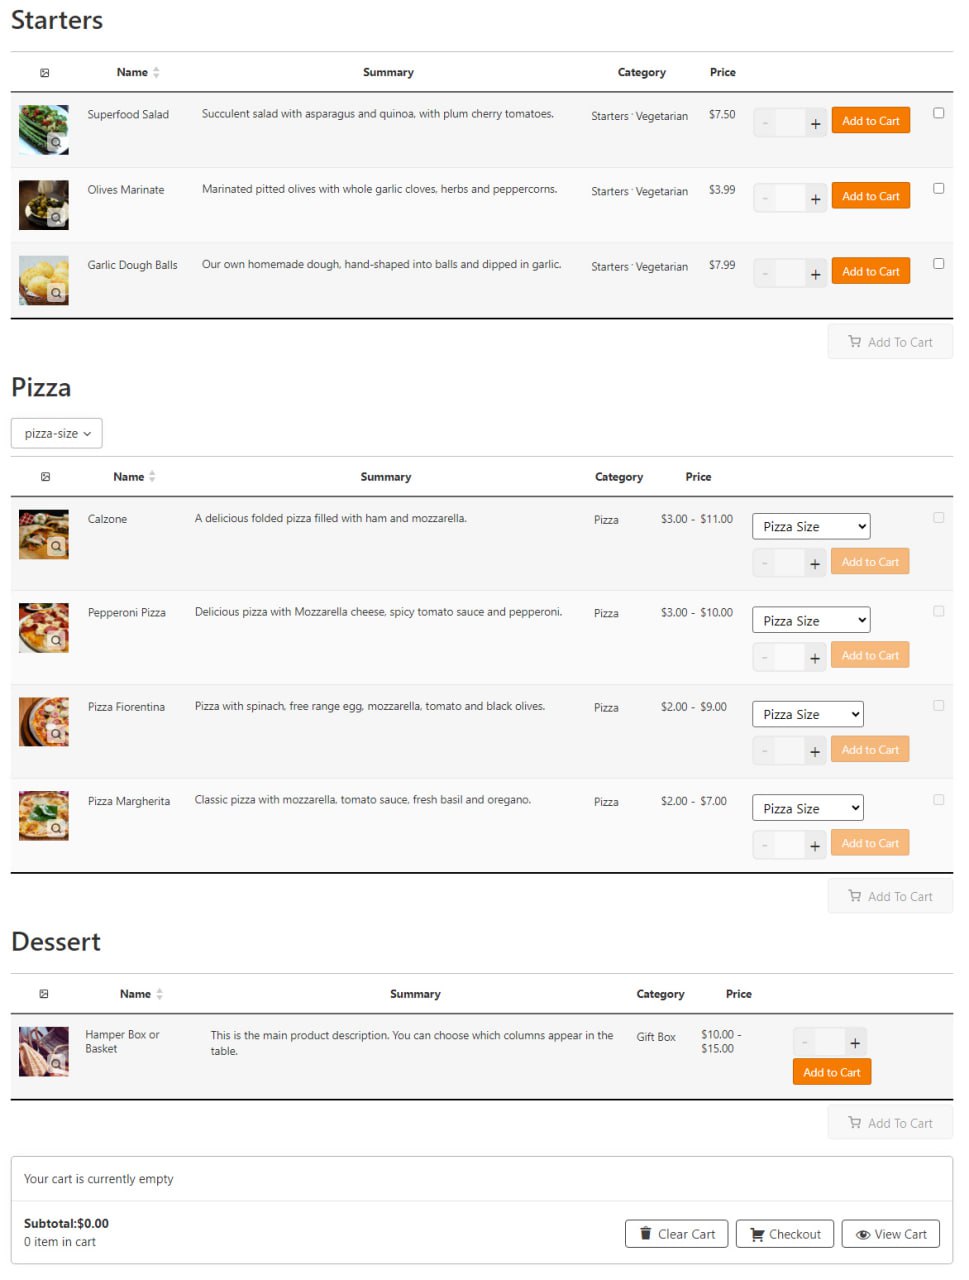
As usually a variety of dishes are available on a restaurant menu, store managers need to display food, desserts, or drinks at different tables to customers to make the ordering process easier for them. In our plugin, it is possible to create different queries of your items in the menu and arrange them in different tables with different layouts and appearances. Finally, you can display the shortcode of all the tables on one page with a suitable layout for customers to see food, desserts, and drinks at separate tables but on the same page.
To make this happen, you just need to open the Query tab in our plugin and then choose one of the product categories in the Include Taxonomies field.

For example, you can add Starters, Pizza, and Dessert in three separate tables, then go to the All tables option and copy and paste their shortcodes one by one to a new WordPress page. By publishing the page, all three menus are displayed in a responsive ordering system.
Add a mini cart to the restaurant ordering form
Adding a mini cart is another feature for satisfying customers and making a great buying experience for them. The mini-cart is usually added to the navigation bars. So, to show a customized mini cart to your customers, you need to go to the Navigation tab in our plugin and then add the Minicart element to the Header, Footer, or Sidebar section.
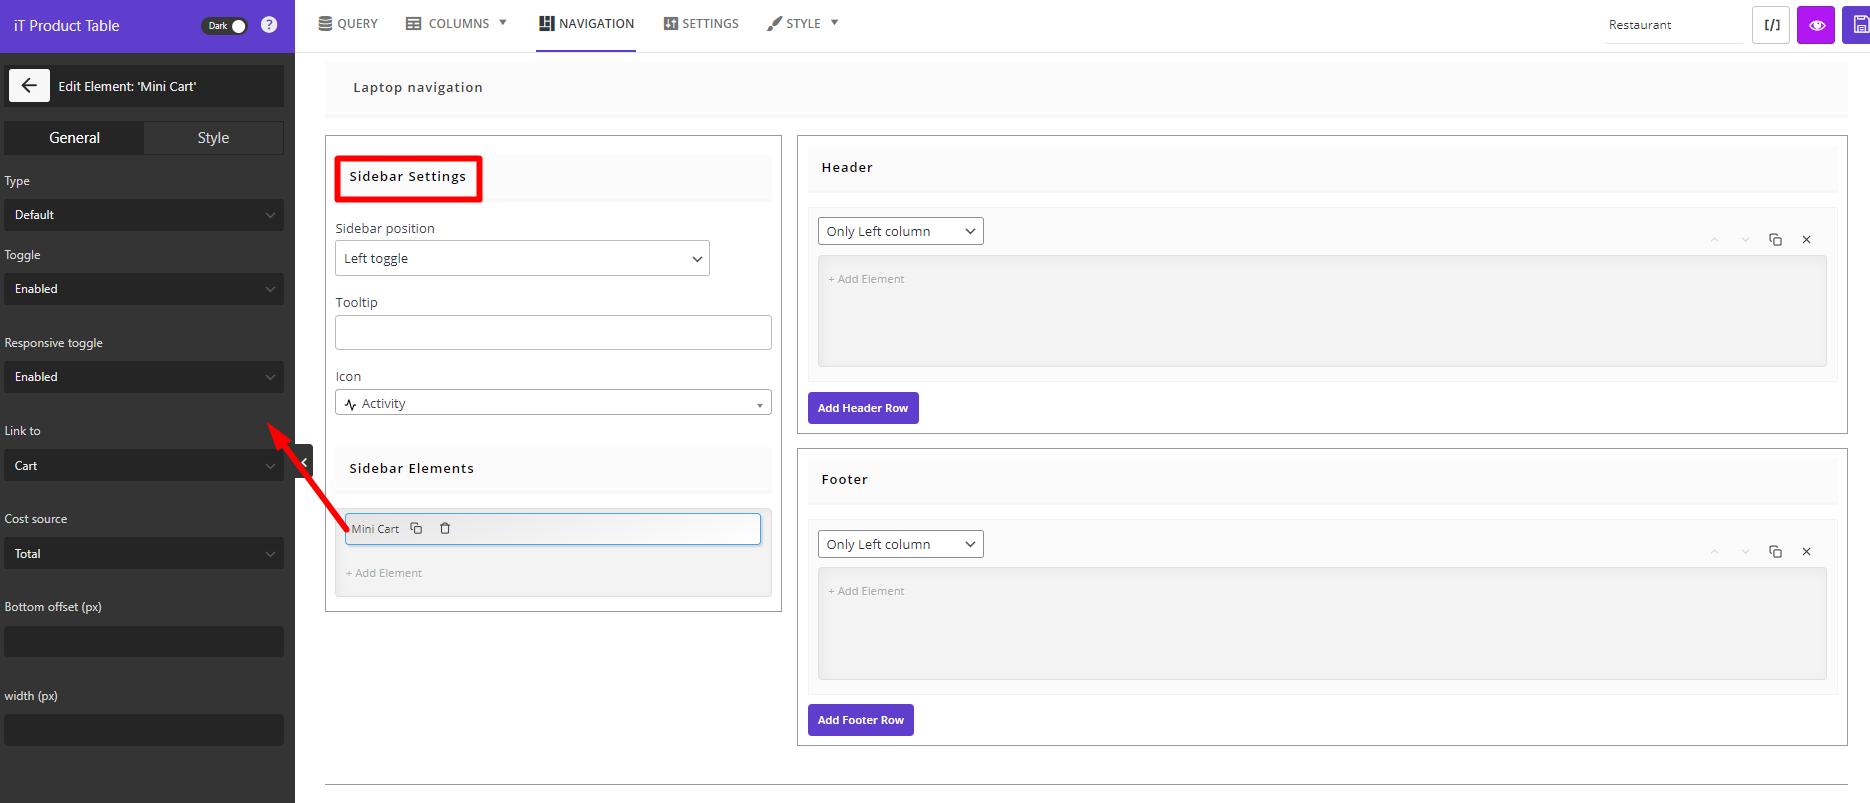
For example, we set the below configurations in the General tab of the Minicart element and added the mini cart to the sidebar:
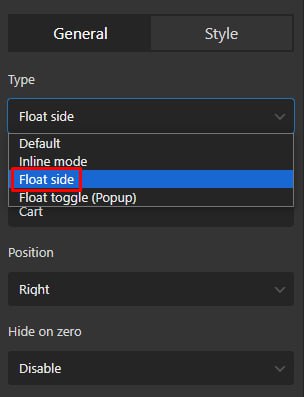
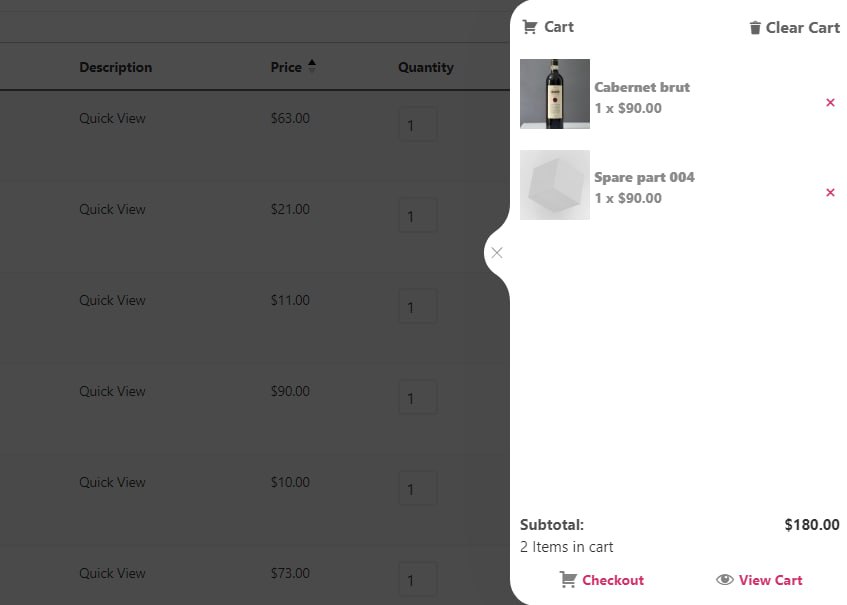
So, they can see the result below in the table:
Add product filter and search to the restaurant order form
Product filter and search are essential features for WooCommerce restaurant ordering systems that make the process of finding food easier and faster for your hungry customers. Just like the mini cart, you can add filtering and searching options to the navigation bars by opening the Navigation tab and adding different elements to the Header, Footer, or Sidebar.
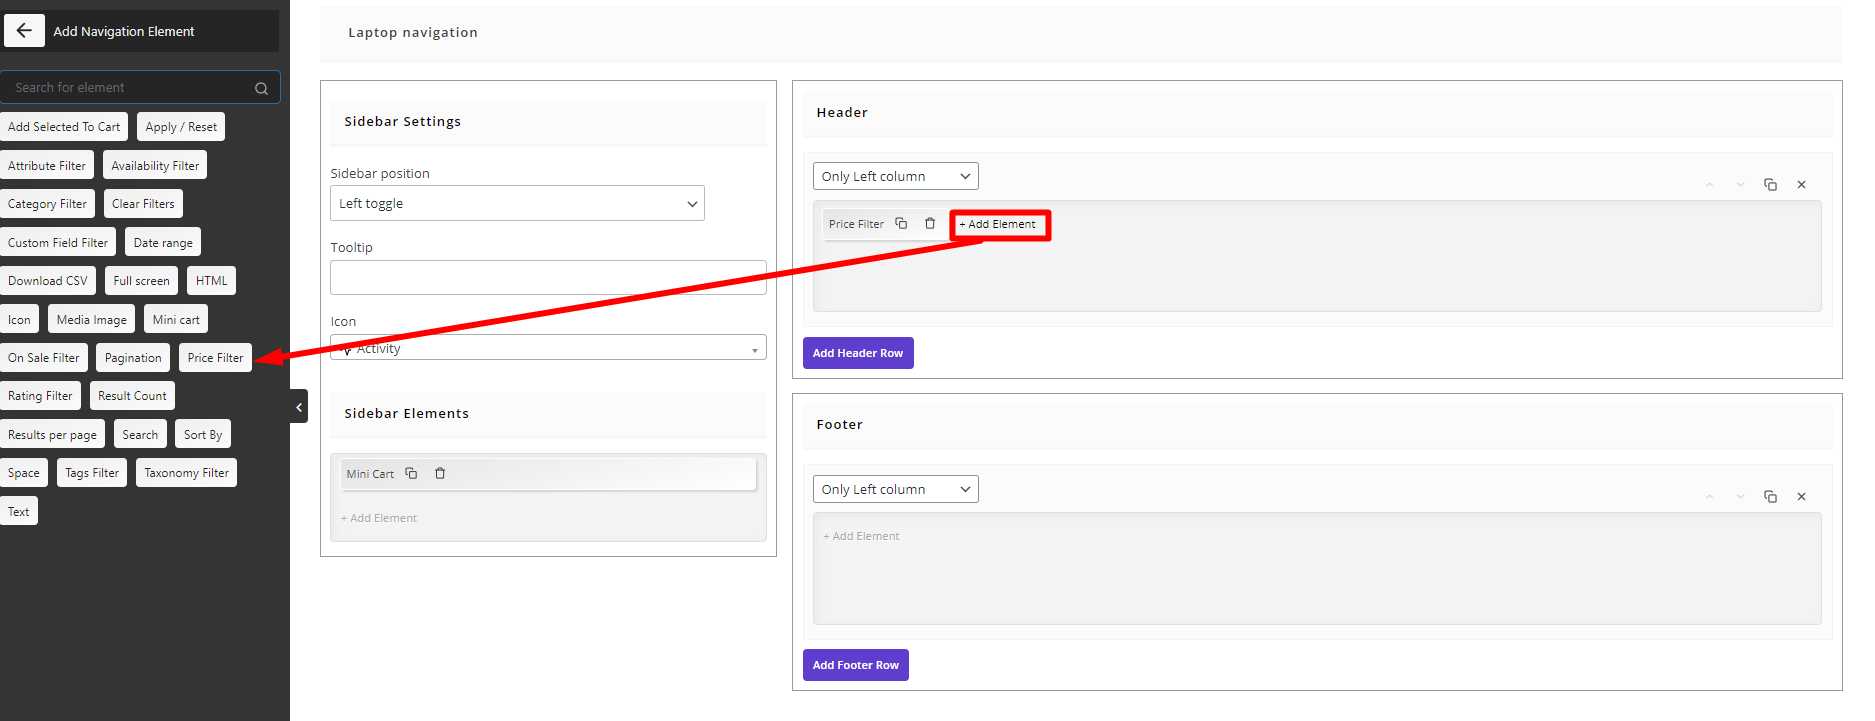
There are various filtering options available in the Elements list, like price filter, category filter, attribute filter, etc. You can add one or more of them to the navigation bars of your WooCommerce restaurant ordering system.
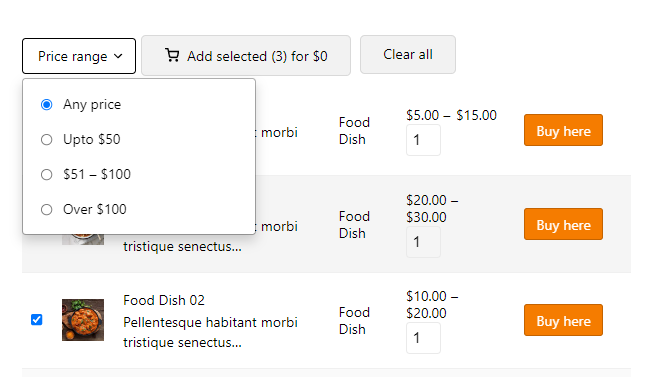
For example, we added a Price Filter to the Header as illustrated below:
Add multi-add to cart to restaurant ordering form
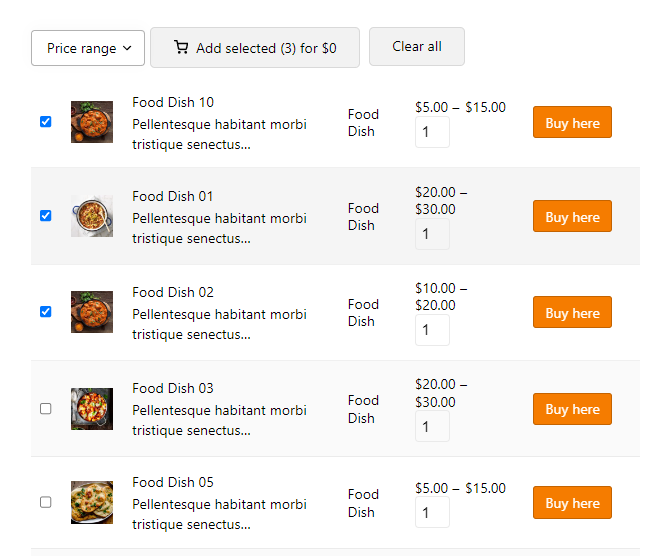
Customers usually choose multiple items from the WooCommerce restaurant ordering system and expect to add them to their cart with one click. To meet your customer’s demand, you can easily choose the Add Selected to Cart element from the list and add it to one of the navigation bars.
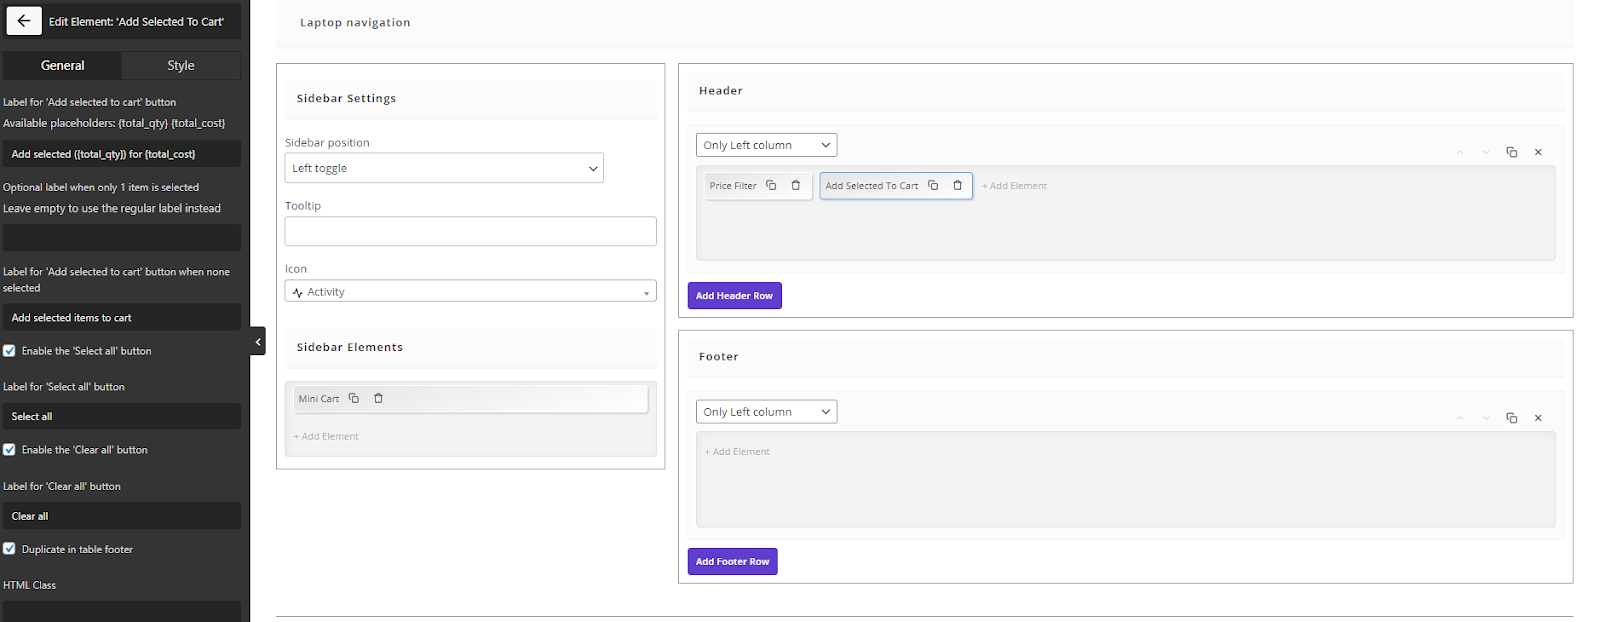
As illustrated below, an Add selected button is displayed to your customers, and they can mark multiple items in the online menu and add them to their cart with just one click:
WooCommerce Product Table Plugin
The easy way to create a restaurant food ordering system with WooCommerce

Conclusion
If you want to provide customers with an online food ordering menu, creating a WooCommerce ordering system with a WooCommerce food ordering plugin is a much more affordable way than using third-party services like UBER Eats.
By following the instructions we shared with you in this post, you can easily create a custom online food ordering system on WooCommerce using the WooCommerce product table plugin.
Are you ready to create your online food ordering system?


